To use Azure AI Translator as the machine translation service with Easy Translator for Confluence, ensure your Confluence server can open a connection to the Azure Text Translation endpoint (for example: https://api.cognitive.microsofttranslator.com/). You may have to adjust proxy and firewall settings to allow those requests to pass through. If you use a private endpoint in Azure, make sure your server can route to that private IP as well.
Setting up Azure AI Translator
To use Azure AI Translator as a machine translation service, you will need an active Azure subscription and a Translator resource.
Create a Translator resource
-
In the Azure portal, create a Translator resource, choose a Region (Location) and a Pricing tier, then deploy it.
-
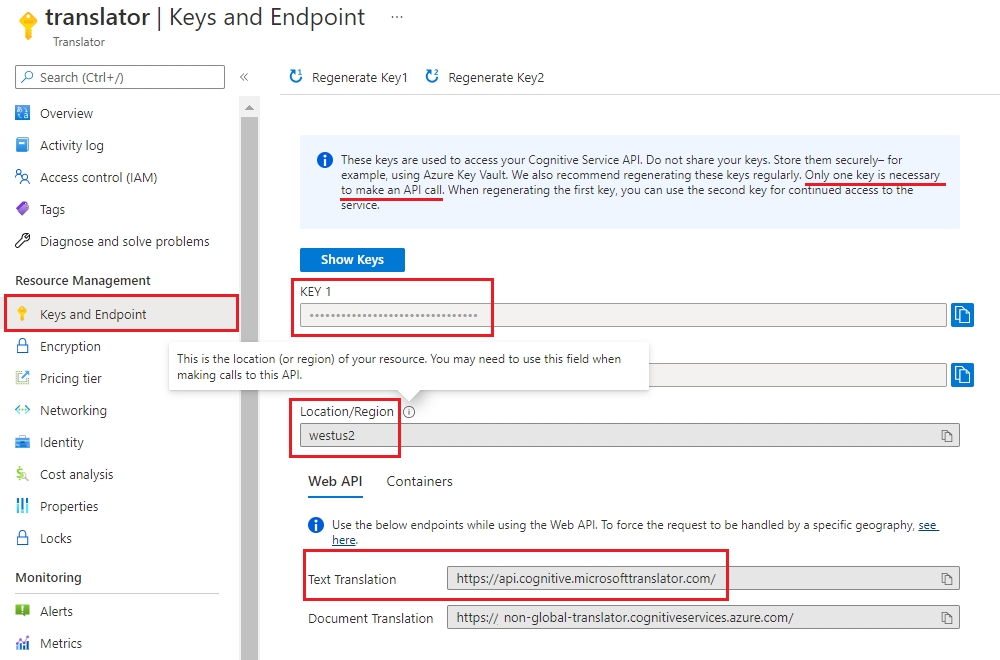
After deployment, go to Keys and Endpoint to retrieve:
-
Key (authentication key)
-
Location/Region
-
Text Translation URL endpoint
These values are required to configure Easy Translator for Confluence.
-
Azure AI Translator configurations | Image
Configure Easy Translator in Confluence
Once you have your Azure resource details:
-
Open Settings in your Confluence server.
-
Go to Easy Translator for Confluence → General Settings.
-
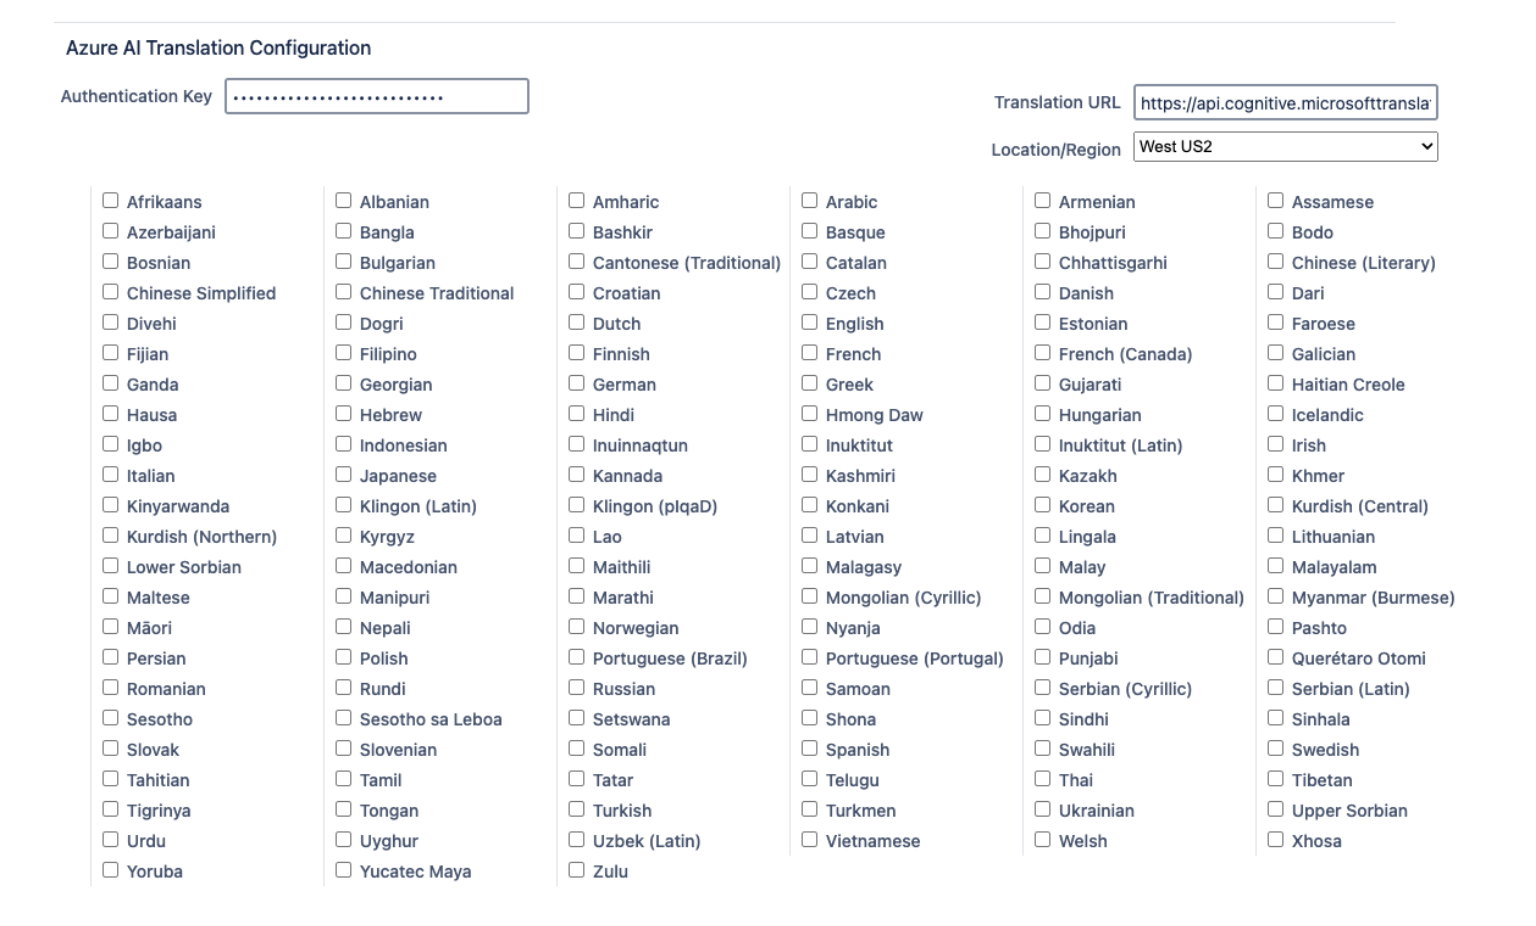
Under Azure AI Translation Configuration, fill in:
-
Authentication Key: paste your Azure Translator Key.
-
Region / Location: the Azure Location/Region of your resource.
-
Azure URL: Enter your Text Translation endpoint (use your private endpoint if configured). If left blank, the default
https://api.cognitive.microsofttranslator.com/will be used.
-
-
Choose which of the supported languages should be enabled for use.
-
Click Save to authenticate the credentials and confirm the setup.
Google Cloud Translation API configurations | Image