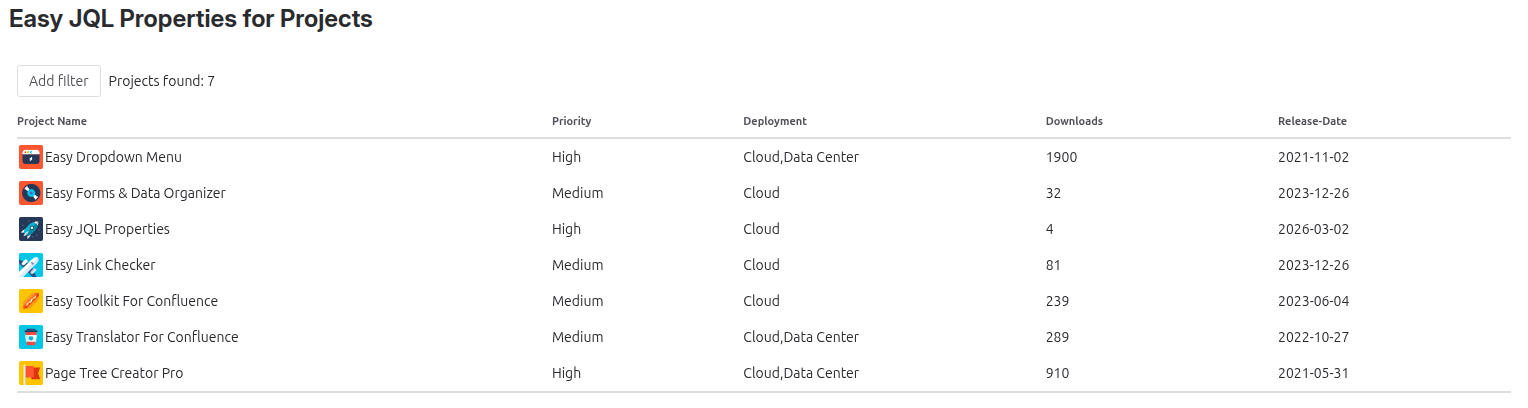
The Project Overview page allows you to view all your Jira projects in a single table with their respective JQL properties and filter them dynamically using an advanced filter system.
Note: only properties that are set to “active” in the Global Settings are displayed in the overview table.
Project Overview | Image
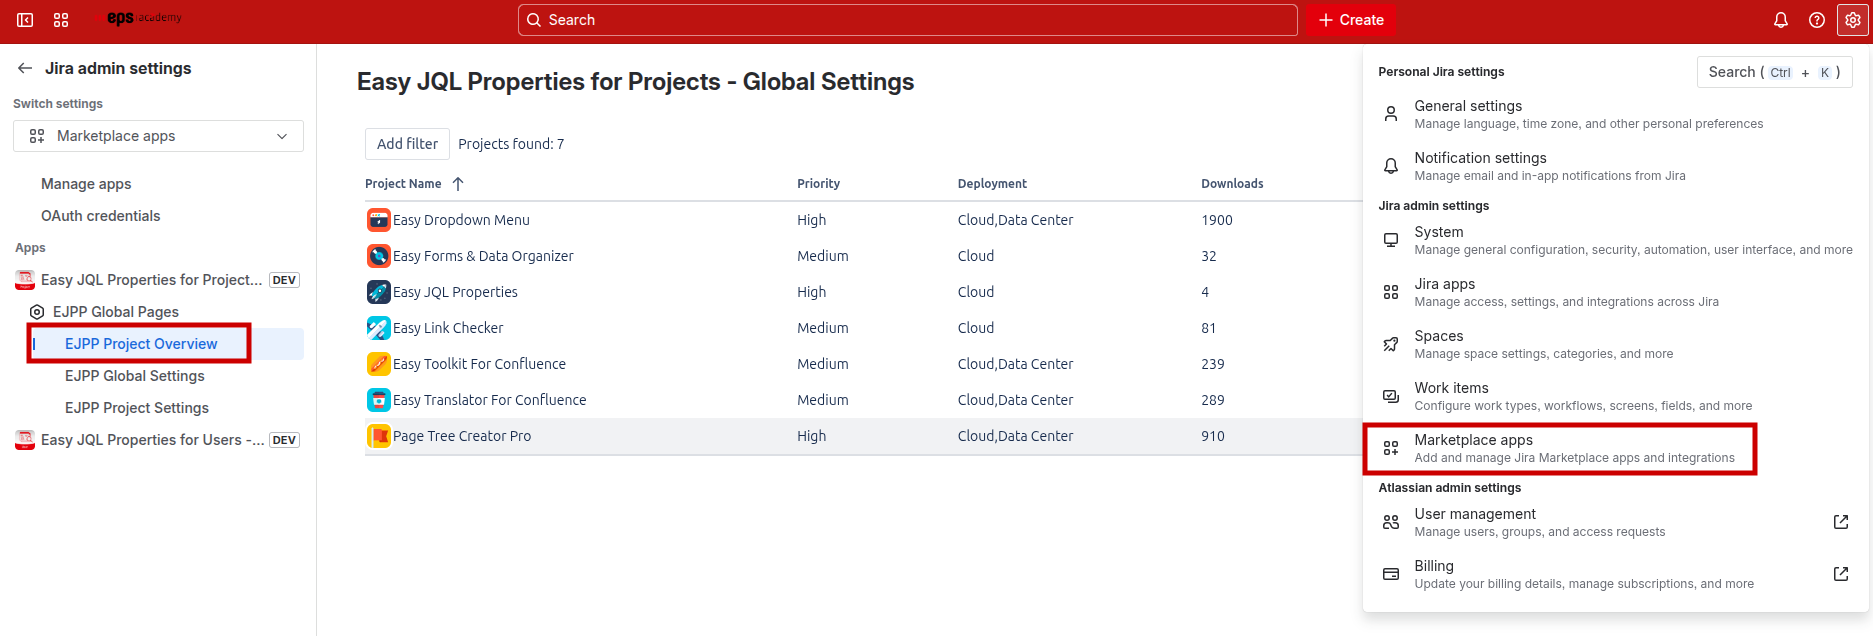
1. Navigate to the Project Overview
-
In Jira, click on the Settings icon in the top right
-
Navigate to Marketplace apps → Easy JQL Properties for Projects
-
Click on EJPP Project Overview
Find Project Overview | Image
2. Creating your first filter
-
Click the Add filter button at the top of the page → a new filter bar appears
-
In the filter bar, click the Add Property dropdown
-
Select a property from the list (e.g., Priority)
-
A new filter button appears in the bar
-
Click on the newly created filter button (e.g., Priority)
-
A pop-up opens based on the property type
-
Select or enter your filter value
-
Click Save
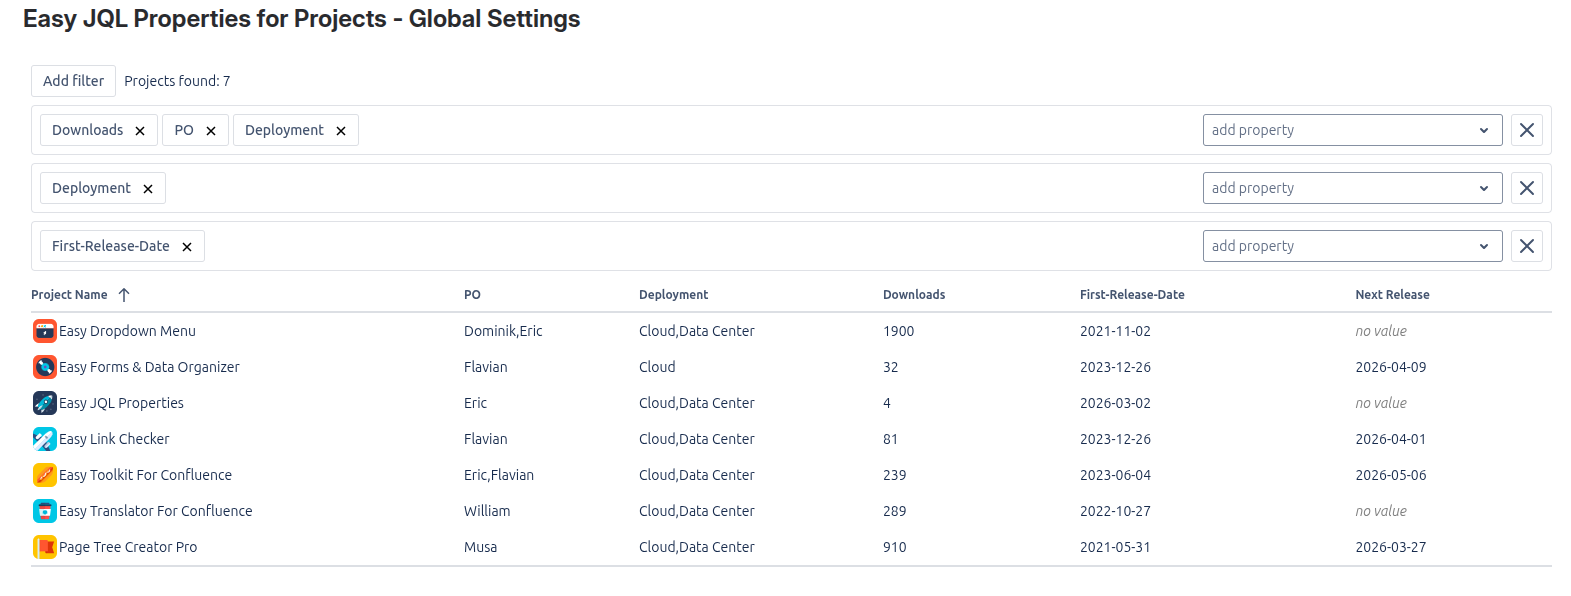
The table automatically updates to show only projects matching your filter!
-
a property can only be used once per filter bar
-
all properties, which were set to “active” in the Global Settings, are listed in the “add property” dropdown
Example Filter | Image
3. Using different filter types
The filter system supports four property types, each with its own filter interface:
4. Remove Filters
Remove a single filter:
-
Click the X icon next to the property name in the filter button
Remove an entire filter bar:
-
Click the X button on the right side of the filter bar
Understanding the Filter logic
Within a Filter Bar (AND-logic)
All filter buttons in the same bar must match for a project to qualify.
Example: “Priority = High” AND “Downloads > 100” means a project needs both conditions to be shown.
Between Filter Bars (OR-logic)
A project qualifies if it matches any one of your filter bars.
Example: Projects matching Bar 1 or Bar 2 or Bar 3 will be shown.
Special Cases:
-
No filter bars or empty filter bars→ All projects displayed
-
Empty filter buttons → Ignored (treated as “no filter”)
-
Multiple bars with the same filter button → Creates complex OR-conditions