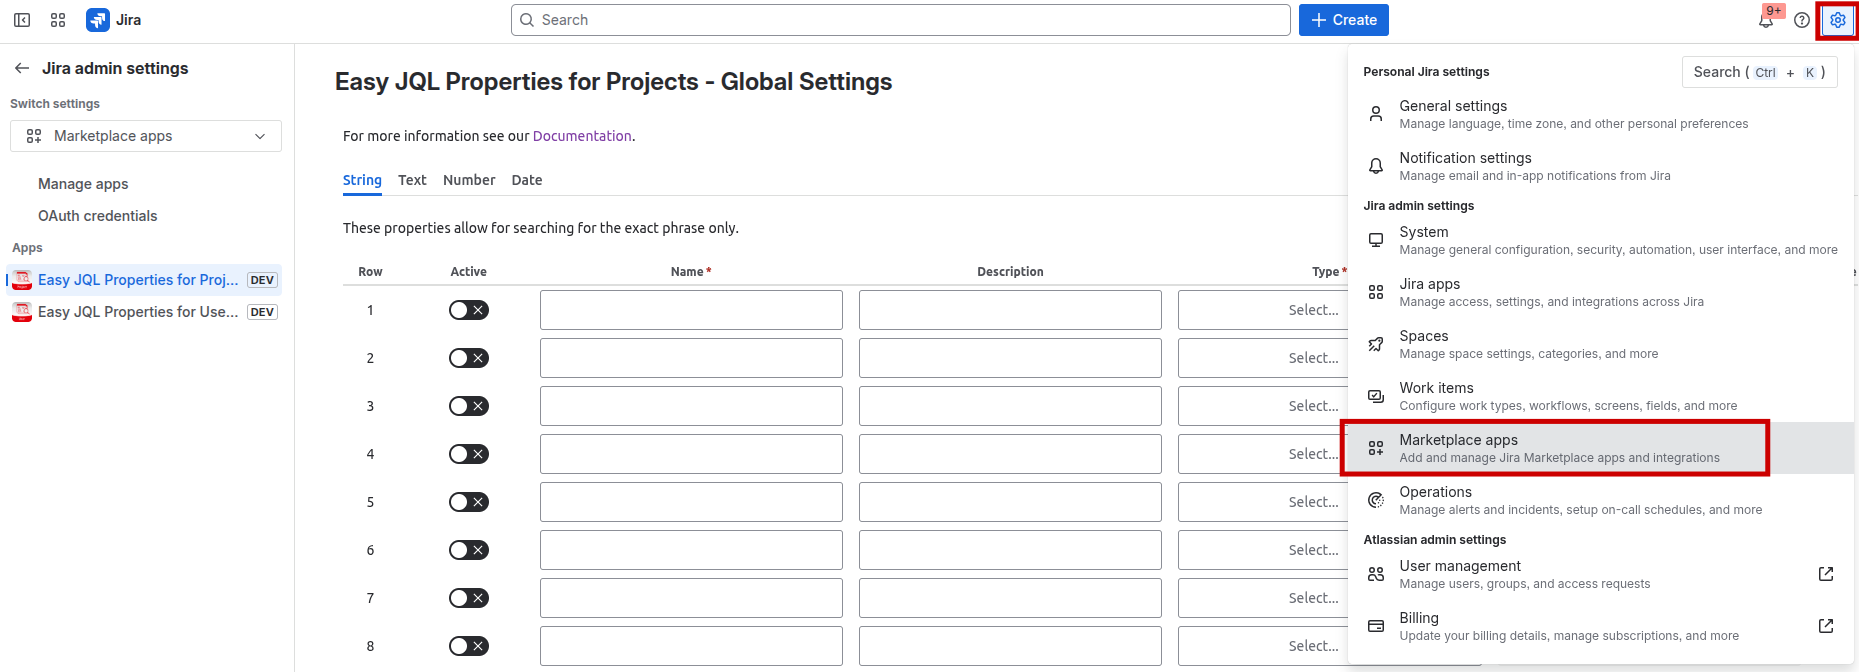
First, configure the properties in the global settings under Settings → Marketplace apps. There, you choose the app you want to use. In our example, we use the Easy JQL Properties for Projects → EJPP Global Settings.
Now, we set a name, a type and optionally a description. Values will be set later.
Also, don’t forget to activate the property under Active and click Save.
Next, we move into our project and go to the Project settings → Easy JQL Properties for Projects and see, that the properties we saved are now accessible to set for all users with project admin permissions.
Here, we can set a value for our property and save it.
Lastly, we click Filters → Search work items. There, we make sure, the filter is set to JQL on the very left of the screen.
We can now use our defined values in the input field.
See Use Properties in JQL for a guide on how to use the JQL search.


